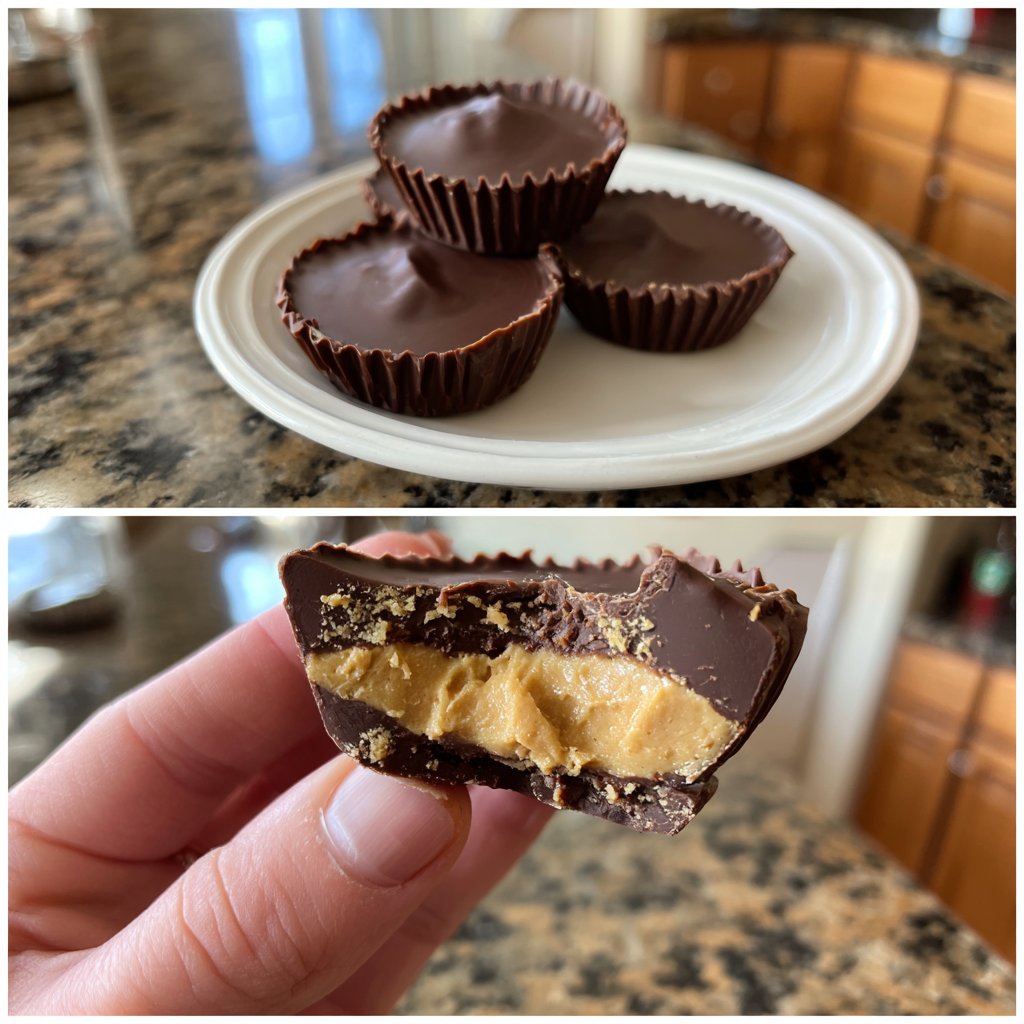
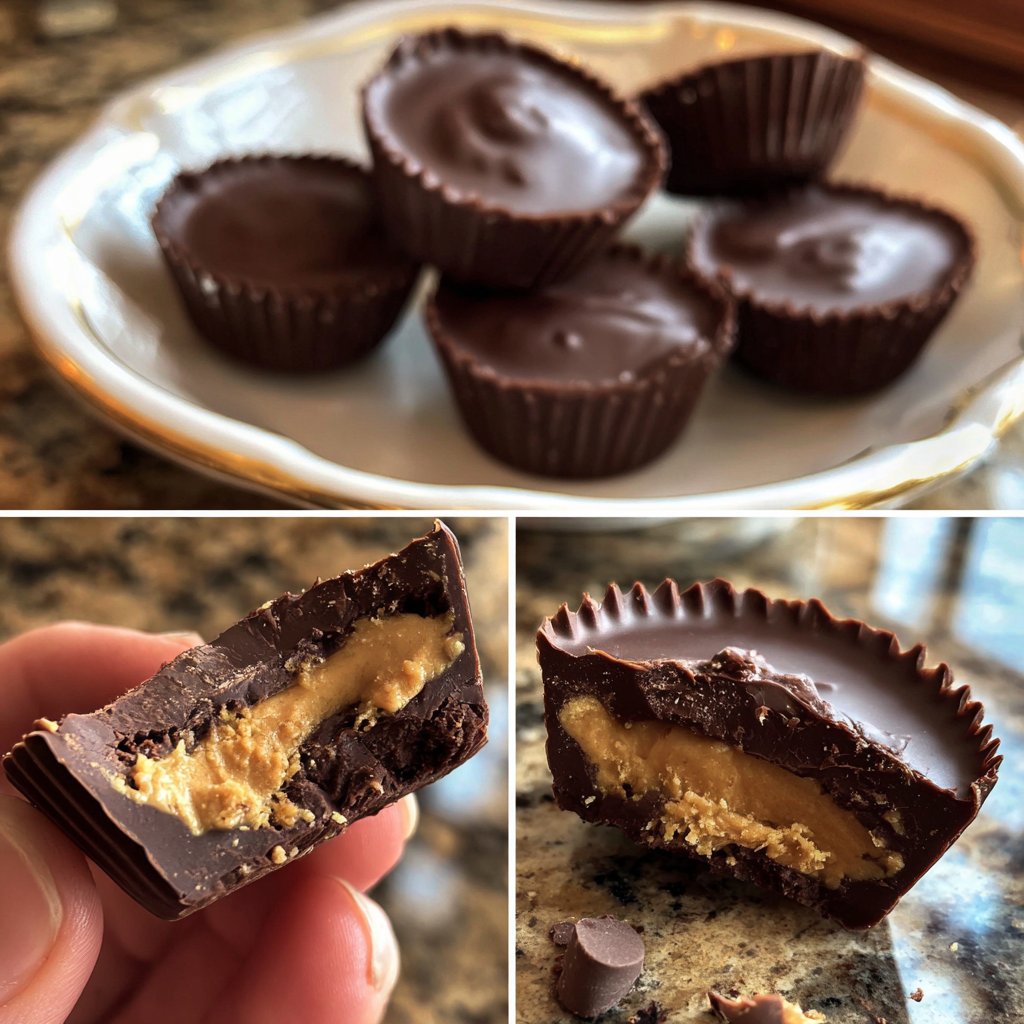
Homemade Reese’s Cups Mini Bites
Highlighted under: Butter, Sugar & Flour
I’ve always been a fan of peanut butter cups, and making them at home has been such a rewarding experience. After trying several recipes, I've perfected my own take on mini bites that are just as creamy and indulgent as the originals, but with a homemade touch. These bites are perfect for satisfying my sweet tooth, and I love that I can control the ingredients to make them even better. Plus, they are incredibly easy to whip up, making them a go-to treat for sharing or enjoying all by myself.
When I first attempted to make these mini bites, I was surprised at how simple the process was. It allowed me to indulge in a classic treat while knowing exactly what was going into them. I discovered that gently melting the chocolate and keeping it at a low heat prevents burning and gives the cups that perfect glossy finish.
One weekend, I decided to experiment by adding a pinch of sea salt on top before they cooled completely, which elevated the flavor dramatically. The combination of salty and sweet is something I can't resist, and now it’s a must every time I make them!
Why You Will Love This Recipe
- Rich chocolate flavor with a creamy peanut butter center
- Perfectly portioned mini bites for a sweet treat anytime
- Easily customizable to include your favorite toppings or variations
Essential Techniques for Perfect Mini Bites
When melting chocolate, precision is key. Microwaving in 30-second intervals helps prevent overheating and allows for gradual melting. You’ll know it’s ready when the chocolate is smooth and glossy. If you accidentally overheat the chocolate, you can rescue it by stirring in a small amount of vegetable oil to re-emulsify it, restoring that silky texture.
Using a mini muffin tin not only makes portioning easier but also creates that desirable shape. To ensure the chocolate easily releases, consider lightly greasing the tin or using silicone molds. Silicone provides an extra advantage as it’s flexible and helps pop out the mini bites effortlessly without needing any additional lubrication.
Ingredient Insights and Substitutions
The creamy peanut butter gives these cups their signature flavor, but feel free to experiment with nut butters if you are looking for alternatives. Almond or cashew butter can give a unique twist while maintaining the same creamy texture. Just ensure the substitute is also creamy and smooth to replicate the original recipe’s consistency.
For those mindful of sugar intake, consider substituting the powdered sugar with a sugar alternative like erythritol or a blend made for baking. Keep in mind that these alternatives can sometimes have a cooling effect, so make small adjustments to taste until the balance is just right.
Storing and Serving Your Mini Bites
These mini bites can be stored in an airtight container in the refrigerator for up to two weeks. If you want them to last longer, try freezing them; they can maintain their flavor and texture for up to three months. Just ensure they’re in freezer-safe containers to prevent freezer burn. When you're ready to enjoy a bite, let them thaw in the fridge for a few hours for best results.
Ideal for parties or as a sweet snack at home, these homemade Reese’s Cups can be garnished with various toppings. A sprinkle of sea salt enhances the chocolate, while crushed nuts or sprinkles can add an attractive crunch. I like to drizzle some melted dark chocolate on top for a decorative finish that stands out.
Ingredients
Ingredients for Homemade Reese’s Cups Mini Bites
Ingredients
- 1 cup semi-sweet chocolate chips
- 1/2 cup creamy peanut butter
- 1/4 cup powdered sugar
- 1 teaspoon vanilla extract
- 1/4 teaspoon salt
Make sure to measure the ingredients accurately for best results!
Instructions
Steps to Make Homemade Reese’s Cups Mini Bites
Melt the Chocolate
In a microwave-safe bowl, melt the chocolate chips in 30-second intervals, stirring in between until smooth.
Prepare the Mold
Using a mini muffin tin, add a spoonful of melted chocolate to each cup, spreading it to cover the bottom and sides.
Make the Peanut Butter Filling
In a mixing bowl, combine peanut butter, powdered sugar, vanilla extract, and salt. Mix until smooth and creamy.
Assemble the Bites
Spoon a small amount of the peanut butter mixture into each chocolate-covered mold, then top with more melted chocolate to seal.
Chill and Serve
Refrigerate the mold for about 15 minutes or until the chocolate is set. Pop the bites out of the mold and enjoy!
Serve these mini bites chilled for the best texture!
Pro Tips
- Feel free to experiment with different types of chocolate or nut butters to create your own unique flavors.
Troubleshooting Common Issues
If you find your chocolate isn’t setting properly, it could be due to moisture getting in. Make sure your mixing tools and bowls are completely dry before use. If your filling seems too runny, add a bit more powdered sugar to thicken it up. It should hold its shape when scooped but still be spreadable.
In case the chocolate hardens too quickly when pouring into the molds, work in smaller batches. Also, try warming the molds slightly first—this can help maintain the pourability of the chocolate, giving you more time to work before it sets.
Creative Variations to Try
For an unexpected flavor twist, consider adding a pinch of cinnamon or a dash of chili powder to the peanut butter mixture. This subtle change can elevate the overall taste and add an exciting warmth that complements the sweetness of the chocolate beautifully.
Another fun variation could involve mixing in crushed pretzels or crispy rice cereal into the chocolate layer before it sets, giving it an added crunch. This texture combination can change the bite experience, making it even more delightful to enjoy.
Questions About Recipes
→ Can I use milk chocolate instead of semi-sweet?
Yes, milk chocolate can be used for a sweeter taste.
→ How should I store the mini bites?
Store them in an airtight container in the refrigerator for up to two weeks.
→ Can I make these gluten-free?
Yes, as all the ingredients listed are gluten-free. Just make sure to check the labels.
→ What can I use instead of powdered sugar?
You can substitute with honey or maple syrup, but the texture may be slightly different.
Homemade Reese’s Cups Mini Bites
Created by: Rosie Mitchell
Recipe Type: Butter, Sugar & Flour
Skill Level: Beginner
Final Quantity: 24 mini bites
What You'll Need
Ingredients
- 1 cup semi-sweet chocolate chips
- 1/2 cup creamy peanut butter
- 1/4 cup powdered sugar
- 1 teaspoon vanilla extract
- 1/4 teaspoon salt
How-To Steps
In a microwave-safe bowl, melt the chocolate chips in 30-second intervals, stirring in between until smooth.
Using a mini muffin tin, add a spoonful of melted chocolate to each cup, spreading it to cover the bottom and sides.
In a mixing bowl, combine peanut butter, powdered sugar, vanilla extract, and salt. Mix until smooth and creamy.
Spoon a small amount of the peanut butter mixture into each chocolate-covered mold, then top with more melted chocolate to seal.
Refrigerate the mold for about 15 minutes or until the chocolate is set. Pop the bites out of the mold and enjoy!
Extra Tips
- Feel free to experiment with different types of chocolate or nut butters to create your own unique flavors.
Nutritional Breakdown (Per Serving)
- Calories: 100 kcal
- Total Fat: 6g
- Saturated Fat: 2g
- Cholesterol: 0mg
- Sodium: 50mg
- Total Carbohydrates: 10g
- Dietary Fiber: 1g
- Sugars: 8g
- Protein: 2g